This eyeshadow tutorial is for the women over the age of 60! Yeah, it is for the most beautiful women on this planet which I find many cosmetic brands choose to ignore.
The Colors

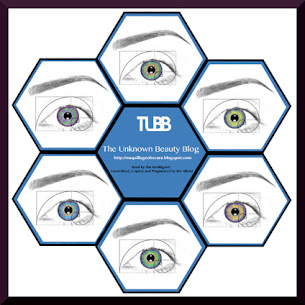
Olivia Sr., my mom, has volunteered for this tutorial, for I think it is only fitting to see how easy this application is with the eyeshadows. There really isn't much to know unless specified. It follows the Boundaries of the Eyes. You will see the basic area in where the eyeshadow is applied. The powders may look super bright but I assure you that they don't age the skin as you will see in the end.
The colors used are the Wise Owl Optic Cream Eyeshadow, Bimixual Taupe, Pixelated Peach (all not available in this universe), a matte caramel brown, and a dark brown. Similar colors would be a shimmer ivory gold (powder it down to matte it a little before applying the other eyeshadows on top), a satin taupe, a golden-flecked peach, and the usual warm medium matte brown, and dark matte brown.
Wise Owl Optic Cream Eyeshadow

1 -Starting with a prepped eye. The area in red shows where the cream will be applied. It may look like a large area than usual but afterwards, the eye area will be covered with concealer/highlighter to get rid of any fall out from the powder. 2- The general direction in theeyeshadow application.

3 - Apply the shadow, concentrating on the center of the lid to capture the maximum amount of light. 4 & 5 - The eyeshadow has been applied from lashline to browbone and the bottom lashline. You don't have to be too neat about it. Like I said it will be all cleaned up.
The Bimixual Taupe

6 - Bimixual Taupe (or a soft satin taupe). 7 - The area the taupe will be applied. 8 - The general direction of application.

9- Basically, the orbital ridge is being defined. 10 & 11 - Continuing the application of the taupe. You can see how far it goes especially when you see the side view. Remember, it is applied on the bone, not the flesh.

12 & 13 - Continue all around the bottom lashline. Taupe is almost equivalent to what the non-repro blue pencil is to copy machines; it just creates depth naturally without whiting out the area. You can read more about the importance of taupe here.

14 & 15 - Here you see the naturalness of the taupe from the front and side.
Pixelated Peach Eyeshadow

16 - This is the basic application area of the peach. Notice how it is applied all around the lid area and all around the bottom lashline and inner eye corner. Also notice the wide arc or the application on half the browbone and down to the upper cheekbone, this is to highlight that area without making it look to white. 17 - The areas show the general direction of application. This pretty much follows the curvature eye and its bone structure.

18 & 19 - Starting at the inner corner of the eye, apply the peach eyeshadow and apply to the lid area.

20 - Notice the eyeshadow is applied a little into the bone indentation, this will brighten up that little corner of the eye. 21 - Continue all the way around the bottom lashline area and meet with the inner corner, the starting point.

22 - This time starting right where the browbone begins to curve to the side or where the arch of the eyebrow starts, apply the same peach. 23 - Continue, notice how it follows the curve (boundary of the eye). 24 - Allow the powder to highlight just at the tip of the cheekbone. Don't worry if this looks slightly messy, it will all be cleaned up with concealer. The powder will actually add to the highlighting and concealing.
Warm Medium Brown

Warm medium brown or any color of your choosing will do here. This is a color you can use to emphasize the area between the orbital ridge bone and the fleshy lid. Really you are applying it right on the curve of the orbital bone. 25 - The color is applied on the top lashline and around the eye socket. 26 - The direction of application. This is a bit different from the usual because it will blend the color as it is applied. The color will be more dominant around the outer edge of the eyes and fade towards the center.

27 & 28 - Notice how the brush sits within the edge of the eye socket. In actuality, we are enclosing the lid area with this color.

29 - Front view as the brush follows the orbital bone. 30 - Side view. 31 - Following the slope of the orbital.

32 & 33 - Continue on the top lashline. It doesn't have to be exact because eyeliner will be applied. It is more for applying color for depth and blending.
Finishing Up

34 - The dark brown eyeshadow is applied around the top and bottom lashline. No special method, just applied dry. The reason why it works dry in this case was the Wise Owl Optic Cream Eyeshadow. Also, if you are in the wise years of your life, you really don't need a harsh outline of your eyes, as you will see. 35 - Finish up with an application of concealer/highlighter around the bottom lashline to the upper cheekbone area all the way up to the temple to open and lift.

36 & 37 - Finish with drawing in the eyebrows, here Olivia Sr., used the tutorial of Elongating the Eyebrows. Add a light coating of mascara.

38 & 39 - Side view of the finished eye look.
Before & After


See how the eyes are nicely defined and contoured? See how the eyes are lifted and drawn back, making the eyes look bigger? Notice the luminosity of the eyeshadows? Nothing wrong with the shimmer here.
Hope you enjoyed this tutorial. Remember, this can be done on younger eyes but I would say the mature and wise benefit the most!!!