This is part of my Definitive Eyeshadow Guide Series. Basically, it is to make you see and think how eyeshadow can shape the eyes and its relation to the rest of the face. There are guides already in place thanks to your anatomy and these guides all connect to the bigger picture known as your facial structure.
I think as one ages, the hardest part for anyone is to balance their makeup look. You can think colors and such but I am talking about shaping them to fit the age and wisdom you are experiencing.
If you have been following my blogs (Into the Palette will be up and running soon), I am a fan of having eyeshadow look 3D. It should lift the eyes and make them as wide awake as possible.
Boundaries
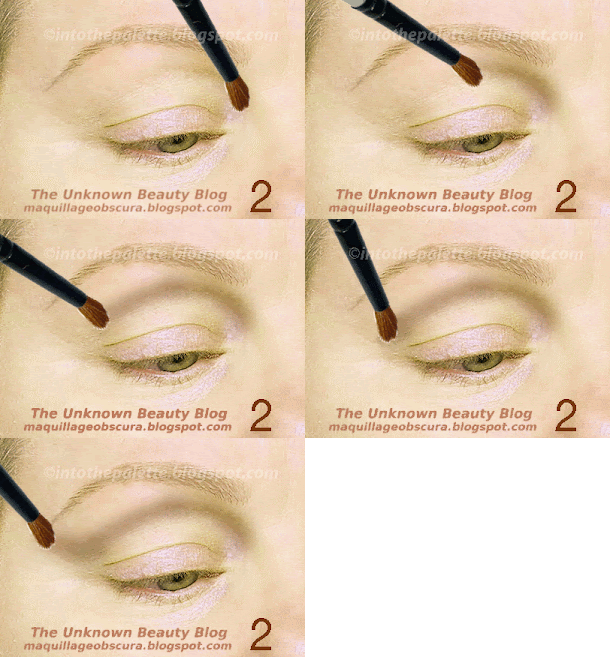
Did you know your eyes have a boundary or what I like to call a fence? The obvious one would be your eyebrows and the side of your nose.
The other one is your cheekbone. These both are the "frames" of the eyes.
Your cheekbone isn't a bone that stands alone, it connects to your frontal process of maxilla or the side of your nose and the external angular process of the frontal bone which is the eye socket simplified. The yellow lines show what I am talking about.
This is the area for shading. Taupe eyeshadow really comes in handy for this. Shading will create an opaque background; stops the lights from going through translucent skin. Shading will give skin some depth to colors layered on top. Shading will also create the illusion of a different eye shape if necessary.
The Yard
Within this area is what will lift to draw the eyes back giving them a dimensional look. It also includes the area which many will find very dominating, the browbone bulge. This area has a tendency to white out because the eyeshadow used is too light and the anatomical structure just highlights the area naturally.
The brown line defines the area of the orbital ridge. You know me, the orbital ridge is the happening place on the eyes! The orbital ridge will define, contour, and create depth to the eyes.
Pretty simple, right? I left the bottom area of the eye out because it is pretty basic compared to the top. I did leave out the steps where it all comes together with highlighting because that has some deeper explanation. Also, the bigger picture is how it flows into the rest of the face. I will explain all of it in a future post. In the meantime, just study this one a bit until it becomes planted in your mind.
*Special thanks to Aldona from Working Beauty.*


