


My brain decided to give me writer's block after the eye brush post. I think I had a short circuit. Now, it is finally up and running and it is allowing me to finish my series on makeup brushes.
Powder
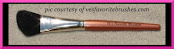
Powder brushes are generally a large size fluffy brush that will apply loose or press powder. There are again many different shapes to suit everyone's needs. In the following picture from left to right: Hana K Super Powder, Face Stockholm #31, Sephora Professionel #50,Lancome stippling brush (received in kit), and Cinema Secrets puff.

The application process is pretty basic, you dip your brush into your powder and sweep the powder in a downward motion on your face. (You want to go in the direction of the facial hair.) And, for you up and coming makeup artists, you should shake out a fair amount of powder onto a palette to avoid double dipping. In the picture above, I show how the different brush shapes affect the powder application process.

- Pic 1- this is the Face Stockholm #31 which is like a broom.
- Pic 2 - you can see that the tip of the brush does all the work.
- Pic 3 & 4 - the powder is swept on and kind of glides it across the face. This brush is more stiff than the regular dome shaped powder brushes that you see, so it actually blends and buffs. It is good to use after a cake foundation application especially if it is applied wet, it will blend the and buff off the excess powder.
- Pic 5 - This one is the stippling brush which can be used for other products too but I showed it with powder.
- Pic 6 - You can see that the application is softer due to the sparse synthetic hair. This isn't bad though because like the eyeshadow fluff picture, this will layer powder without disturbing what is underneath.
- Pic 7 - shows you how the powder rests. It isn't really swept away but softened into the skin. (I admit that I don't really have a need for this brush.)
Okay, the picture above shows how to apply powder with a puff. Yeah, you probably thought just dip the puff and apply. Well, that is fine and then I hear the whining part, "it looks so caaaaakeeeeyyyy." There is probably too much powder concentrated in one area that is why you look like you dipped your face in a bowl of flour. Here is pretty much what I do. It looks pretty tedious but I have been doing it for so long that I don't realize it to be time consuming.
- Pic 8 - shows that I have shaken the loose powder onto the puff.
- Pic 9 & 10 - I rub the powder into the puff to smooth it down and into it. This will allow a light application rather than the initial flurry of powder.
- Pic 11 - With my two fingers acting as a support, I press the puff onto the area.
- Pic 12 - I begin to roll the puff.
- Pic 13 & 14 - I continue the roll to finish the application.
- Pic 15 - the finished powdered area. There isn't much powder there. If it were my face, I have pretty much set my makeup with a very light application of powder. Any powder I see, I will just brush it off with my powder brush.
There are other brushes that can be used as powder brushes, and I have seen people use them. The Hake (HA-keh) brush used in the art world and in Kabuki theater and Geisha world. These do just a good job. You don't have to go find a fancy makeup artist name either, you can find it in an art supply store.
The fan brush and the powder buffing brush (shown here from Kryolan are used by some also. The fan will whisk away excess powder in certain areas or apply certain powders in a specific area. Personally, I have no use for this so I don't own one. The Powder buffing brush looks like a hairbrush and looks like it could poke your skin. It is nothing like that, it is soft like any other makeup brush for the face. This one you use to buff usually after cake application. Theatrical cake foundation is more concentrated and thicker than the cosmetic counter stuff so this really gets the job done. It can be used on the face and body. It really can be used to buff after any application but cake is the one I have seen it used the most for.

BLUSH, BRONZER, & CONTOUR
Blush brushes and bronzer brushes can be interchangeable. Yes, I know there are specialized bronzer brushes out there, but you can use the tip of any blush brush and apply bronzer. The following shows what brushes I use for cheeks, bronzer, contour. Some are repeats. The brushes from left to right: Hana K Powder/Cheek, Da Vinci Classic Blusher Oval shape, Da Vinci Classic Blusher Round, Ve Neill (actually foundation but can be used for cheeks), Cinema Secrets #18 filbert (great for cheek creams), Hana K Contour, and Julie Hewett Cheekie.

The flat domed ones like the DaVinci are generally applied like the filberts, they lick the cheek. The round ones use the tip and are useful for applying on the apples. I know I don't show the skunk or stippling brush, but I really have no use for it as a blush brush because if I use a pigmented blush, I just blot the excess onto a kleenex then apply. From my cheek brush picture I chose to show how the Hana K contour brush, Hana K powder/cheek, and the Julie Hewett Cheekie brush work.

With the Hana K contour brush.
- Pic 1- shows how the powder is applied to the very tip and the tapered edges.
- Pic 2 - as the brush hits the skin, the pointed tip would rest in the hollow of the cheek while the edges applied a softer blend of the contour powder onto the top and bottom area of the hollow.
- Pic 3 & 4 - shows the process and the darker area where the point of the brush rested.
- Pic 5 - shows the end result.
Next up is the Hana K powder/cheek.
I call this a bronzer brush because it is easier for me to remember. It is a round flat top that really applies a color in a large area with softness.
- Pic 6 - shows the powder.
- Pic 7 & 8 - shows how the entire flat head of the brush rests on the skin.
- Pic 9 - I softly sweep it across.
- Pic 10 - the end result.
Julie Hewett cheekie brush is similar to those stencil brushes that you use for arts and crafts. Similar to the bronzer having the flat top, the concentrated roundness and the synthetic hair makes it perfect for cream products.
- Pic 11 -I dot on the cream blush.
- Pic 12 - the entire flat head rests onto the skin.
- Pic 13 - I sweep in a sort of circular motion to buff in the cream.
- Pic 14 - I sweep it out to blend outward.
- Pic 15 - the end result. I would suggest this application just to be used on the apple of the cheeks, spreading it out would look like you spent a long time at the beach and forgot your sunscreen.
An angle brush would do the same as the Hana K contour brush. The application would be similar to the angle eyeliner only that it is resting in the hollow of the cheeks.
Lips
Lip brushes are really the small head filbert brushes, although I have seen the straight edge ones which really doesn't work for my hand. The ones that are pictured are from left to right: Ve Neill camouflage brush (yes it works for lips), Anna Sui sponge tip, Stila (I got it in a kit), and Shu Uemura 6M.

I know you are thinking why a sponge tip. I use it whenever I use a lipliner. You can also use the pointed sponge tip like Ve Neill's soft shadow brush.

Now, how does this work with a lipliner? I find that when I just write a line, even with short strokes, on my lips; it just looks like a lipliner. I want it to blend in with my skin. I want definition without that "look-I-lined-my-lips" look. In the picture you can see how a sponge tip would soften the line.

- Pic 1 - I show a drawn line to compare.
- Pic 2 & 3 - I use the sponge tip to soften the line.
- Pic 4 - shows the harsh edges disappearing.
- Pic 5 & 6 - pretty much shows the end result.
THE SERIES END
WOW! Can I say I feel like I confessed all my makeup brush sins to everyone? I feel like I have lifted a big bag of brushes off my shoulders! I didn't realize how much is out there until I categorized them on this blog. I know there are more that I missed, especially the brushes used in Special FX but I won't go there because I don't know much about it.
What is to come now that I have finished the brushes? Oh, maybe go back to blabbing about products that I haven't reviewed. But honestly, as a normal consumer, if I were reading my blog, I would want to know more about makeup application. What goes where, why does it go there, why don't I look the way I think I should look. You know the usual questions and the answer usually ends up, because my face (facial structure) is different from yours. At least, that is what I said all the time. (Tell me I am not the only one who thought this.) So, somehow in future postings with some reviews mixed in, I will suggest ways (techniques) of application. Put it this way, what you see and what is done are two different things! There might be long pauses because I need to gather all the stuff together to make it as easy to understand for any person. I will probably confuse the hell out of you! It did me way back. In the meantime, just play and have fun!


