As I become more familiar with many of the pro products especially Joe Blasco Ultamattes, I realize that these products are more detail oriented in application. This may sound tedious but it really isn't. It is just a matter of playtime (practice). If makeup were easy to apply especially the pro brands, there wouldn't be makeup schools.
Joe Blasco Ultamattes & UEM Brush
Check out: A Comprehensive Visual Guide to Joe Blasco Ultrabase Foundations
Three important things that I keep in mind when I use pro stuff are the type of brush I am using, the amount on the brush, and the pressure when I apply. Once I have calculated all this in my head the rest is just blending and buffing.
Now, let's take the UEM (Ultamatte Eye Magic) brush. Like I mentioned in the post before, this is nothing like an eyebrow brush. It is more of a brush for detail application.
- 1 & 2 - the UEM brush saturated with the Ultamatte in black.
- 3 - I use the width of the brush and the amount on it gives me a thick saturated application.
- 4 - after blending. The amount used gives a pretty pigmented application. For something more delicate. Let's say you have a splitting migraine but no one believes you, so you decide to draw some blood veins onto your temples.
- 5 - A soft touch with just the tip.
- 6 - With just the softest pressure, the finest line (blood vessel) can be drawn.
- 7 - more veins so people will notice.
- 8 - the end result. Okay, so your migraine is just throbbing and you feel like your head will explode like in the movie Scanners. First, the blood vessels have to pop.
- 9 & 10 - using the entire tip and more pressure, a thick blood like line can be drawn.
- 11 - more blood lines.
- 12 - your head is going to explode, blood is seeping through.
- 13 - I think people will notice your migraine by now. I know, I know, I am no Matthew Mungle but you can see the detailed results of the brush.
Tightline
Now, lets apply these techniques to the eyes with Ultamattes. (No gore or horror stuff just straight beauty techniques.) In the first set of pictures I used the method of drawing blood veins, using light pressure with the UEM brush to tightline or apply color between the lashes.
- 1 - I place the brush right between my lashes.
- 2, 3, & 4 - I lightly drag the brush across and between the lashes.
- 5 - You can see how subtle the line is, I don't want anything overpowering where it can result in making the eye look smaller.
- 6 - is without tightlining.
- 7 - is with tightlining. Very natural yet defined.
Use As Eyeshadow
Using the width of the UEM brush, I apply Eddie Leonard Ultamatte as an eyeshadow.
- 1 & 2 - I start at the corner and swipe it towards my lashline.
- 3 - Marking the corner.
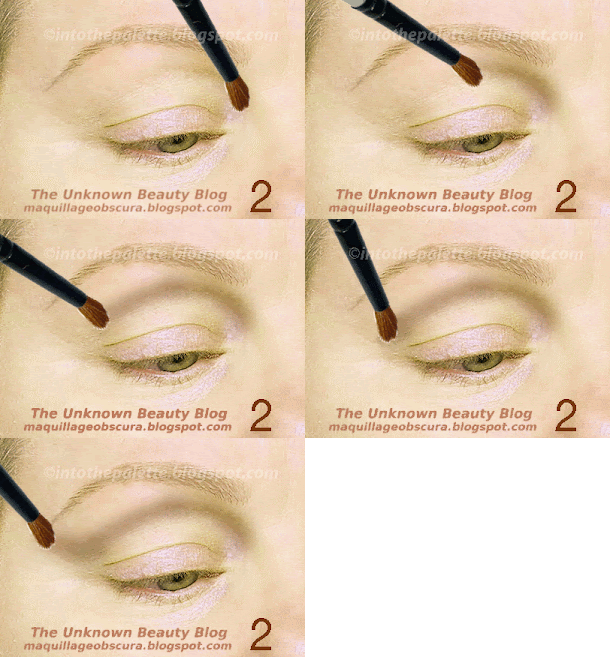
- 4 - I start to define my eyeball area by using the thin edge of the UEM brush with more pressure than the tightlining.
- 5 & 6 - I bring the line all the way around my eye. For Caucasians, this would be your crease.
- 7 - I start to blend with a large filbert brush.
- 8 - Partially blended.
- 9 & 10 - I continue blending until I have pretty much defined the area.
- 11 - I blend to make sure there isn't a distinct finish.
- 12 - the end result.
Instead of using the UEM brush, I use a filbert brush about 1/2 inch (1.3cm) wide. This will result in applying more color and at the same time will blend out onto the brow bone slope which combines two steps to one. What is important here is to define the eyeball area first for the most concentration of color. With these Ultamattes, there is so much pigment that the natural eye bone structure will allow different degrees of color saturation automatically. This looks like you used different gradations of neutrals to create depth when in fact you only used one.
- 1 - With the filbert I apply on my corner area (avoiding the hinge area).
- 2 - What it looks like before I add to the crease.
- 3, 4, & 5 - With the tip of the filbert brush I draw a line around what would be the crease for Caucasians.
- 6 - After the color is drawn on.
- 7 - I start to blend with a large filbert brush.
- 8, 9, & 10 - Since there is more color I can blend all the way up to the brow bone slope, making sure there is no strong line leftover.
- 11 - Shows the eyeball area is defined and the brow bone slope has color also but much lighter due to blending.
- 12 - Looks like two different colors have been applied when it is really only one that has been blended.
Eyeline
Using the UEM brush again, I line my eyes, here I am using Ultamatte in Midnight Brown.
- 1 - I start like I would do a winged liner. I start in the corner (not the hinge area or it droops the eye).
- 2 - I continue until about the center of the eye.
- 3 - I restart from the inner corner and meet in the center.
- 4 - What it looks like not smudged.
- 5- With a small filbert brush, I blend the outer corner into the other Ultamatte (my eyeshadow).
- 6 - I softly smudge the rest.
- 7 - The end result.
- 8 - Again I do the "open ended" eyeline. The bottom never connects with the top. (Mature eyed ladies this won't make your eyes look droopy.)
- 9 - I continue to the inner corner.
- 10 - I smudge with the filbert brush.
- 11 - The finished eye look. I could leave it this way and just set it with no color powder and mascara. Or I can apply powder shadow on top. On its own it looks natural, polished and defined.
At first the Ultamattes may be hard to use, but really all makeup has a learning curve. Maybe, the pro stuff needs more time to understand. But once you do, they become so easy to use that you wonder why you were living without out them!
So, this concludes my series on Joe Blasco Cosmetics. It probably won't be my last. I covered pretty much what I found to be of interest to everyone. Of course, there are more in this line. Just remember, you get products that are high in quality which are not outsourced. You can't go wrong with Joe Blasco products!
Ultamatte Ingredients
Ultamatte Ingredients: Petrolatum, dioctyl adipate, octyl stearate, carnauba wax, octyl palmitate, iron oxides, titanium dioxide, beeswax, corn oil, talc, butyl paraben, polyethelene glycol, tocopherol acetate, ascorbyl palmitate, citric acid, ascorbic acid. May contain: ultramarine blue, silica, chromium hydroxide green.
*PR samples.


